These instructions work under all the client side variations of Windows 7, namely Home Basic, Home Premium, Business, and Ultimate.
Before setting up your VPN connection, make sure your version of Windows 7 is up to date by running Windows Update.
Open the Start Menu
First, click on the Start Menu and type “VPN” into the search box.
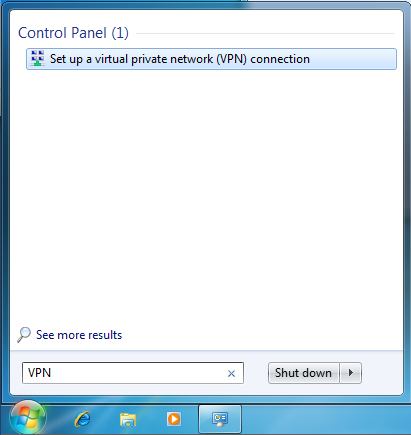
Click on the “Set up a virtual private network (VPN) connection.”
Enter the server information
Now, enter the server information as below.
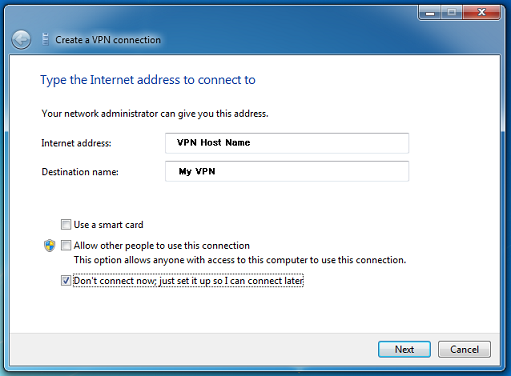
In the text box labelled “Internet address” type VPN server host name: vpn.vpnvip.com or us.vpnvip.com or cn.vpnvip.com or uk.vpnvip.com
In the text box labelled “Destination name” type “My VPN” or whatever you want. This is the name of the connection, and will show up in the “Connect to a network” screen when we’re done.
Lastly, make sure that the checkbox labelled “Don’t connect now; just set it up so I can connect later” is checked.
Then click the “Next” button.
Enter your VPNVIP username and password
In this screen, enter your VPN username and password.

In the text box labelled “User name:”, enter username.
In the text box labelled “Password:”, enter your password.
Optionally, check the “Remember this password” checkbox and you won’t have to enter your password when you connect to VPNVIP.
Then, click the “Create” button.
Go to the connection
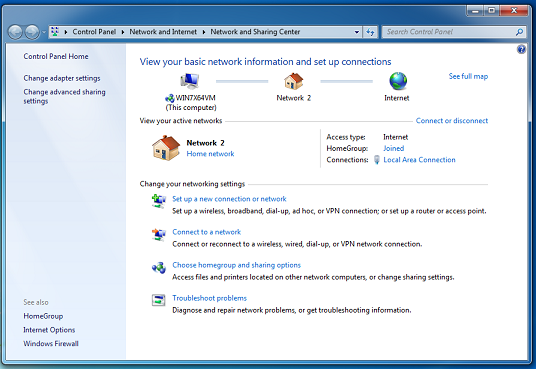
Click on the Start Menu, type the word “Network” into the search box, and click on “Network and Sharing Center”.
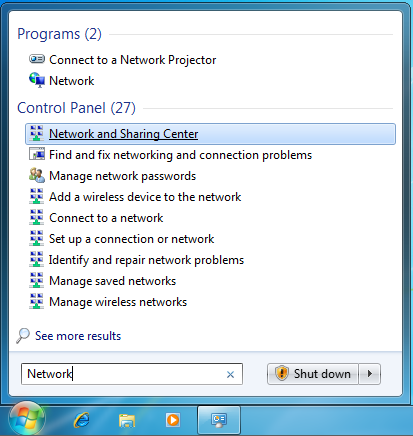
When the Network and Sharing Center opens, click on “Connect to a network”.
When you click on “Connect to a network”, a list of VPNs pops up. Right click on the “My VPN” connection (the VPN connection just created) and choose “Properties”.
Edit the VPN type to L2TP
In the “Properties” of new VPN connection, click on the “Type of VPN” pop up menu and select “L2TP/IPsec”.
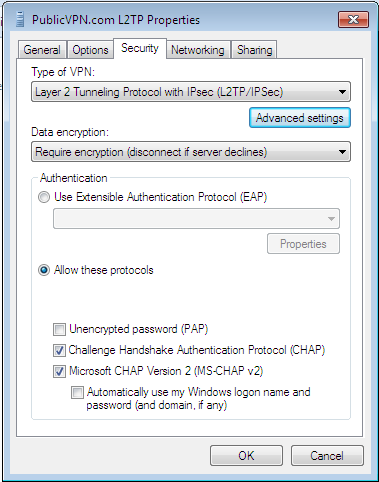
Next, click on the “Advanced Settings” button.
Set the Preshared Key
In the “IPsec Settings” dialog, click the radio button labelled “Use preshared key for authentication”. Then type “VPNVIP” into the textbox labelled “Key”. Then click the “OK” button.

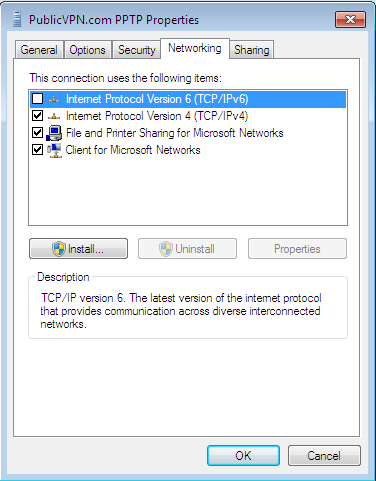
Neworking settings
This screen shows you the network settings. You may have different items in your list. In the list of items that you see, make sure that only the “Internet Protocol Version 4(TCP/IPv4)” and “Client for Microsoft Networks” items are checked. If oher protcols are checked, uncheck them by clicking on the checkbox.
VPNVIP currently does not route anything except TCP/IP version 4.
Done!
You’re now done with your setup! You’ve set up your VPNVIP connection to use L2TP. Click “OK” to finish now, then connect to our VPN server by this connection.